
Appearance
✨ 前端路由介绍 👌
快速总览
- 前端路由用于在单页应用中“无刷新切换视图”。
- Vue 3 使用
vue-router@4,推荐history模式(需服务端支持)。 - 关键组件:
<router-link>负责跳转,<router-view>负责渲染匹配到的组件。 - 路由配置包含
path、name、component,可拓展children、meta等。 - 常用特性:动态参数、嵌套路由、懒加载、编程式导航、守卫。
什么是前端路由
实际上在最早的多页应用时代,并不存在前端路由这么一说,那个时候路由是属于后端(服务器端)的东西,后端会根据不同的请求路由返回不同的页面。
在此开发时期有两个特点:
- 整个项目的前后端代码是杂糅在一起的。
- 多页应用时代,每次切换一个页面,都需要重新请求服务器。
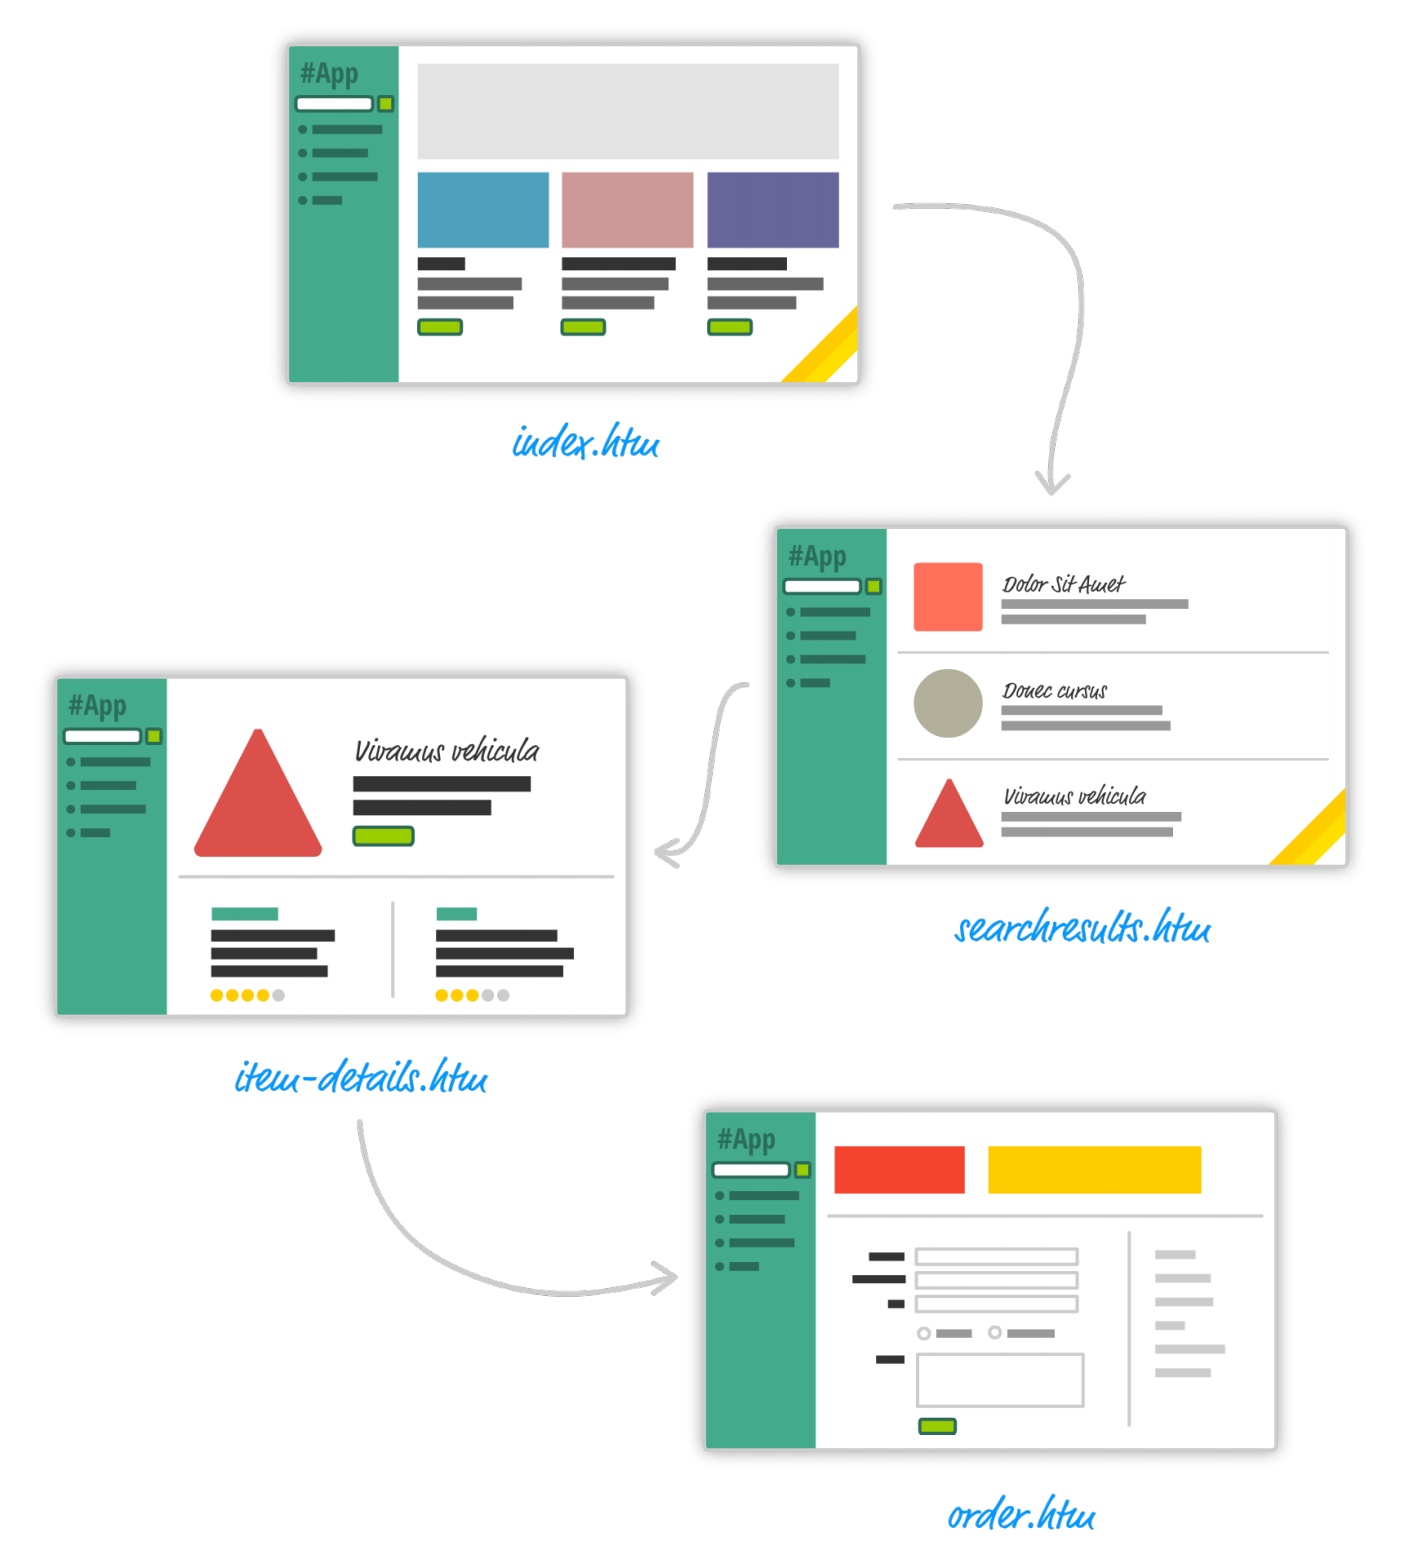
后面慢慢就到了单页应用时代,该时代的特点就是只有一个 HTML 页面,以前视图的切换是整个 HTML 页面的切换,而现在视图的切换是页面上某个模块的切换。

上图中的模块其实就是对应 Vue 中不同的组件,这种组件我们称之为页面级组件 views。有了页面级组件,需要和路由产生一个映射关系,这个其实就是前端路由。
虽然有了前端路由,但是后端路由仍然存在,只不过从之前的路由和页面的映射关系变成了路由和数据接口之间的映射关系。
Vue Router(Vue 3)
Vue 官方的前端路由库:Vue Router 文档 https://router.vuejs.org/zh/
bash
npm i vue-router@4约定与建议
- 路由配置文件通常位于
src/router/index.js。 - 页面级组件建议放在
src/views目录。 - 路由
name建议使用有意义的驼峰/帕斯卡命名,便于编程式导航。
快速入门(3 步)
- 创建两个页面组件
Home.vue、About.vue(位于src/views)。 - 在
src/router/index.js创建并导出路由实例。 - 在入口
main.js挂载路由,页面使用<router-link>和<router-view>。
js
// src/router/index.js
import { createRouter, createWebHistory } from "vue-router";
import Home from "../views/Home.vue";
import About from "../views/About.vue";

const router = createRouter({
  // 常见模式:createWebHistory() 或 createWebHashHistory()
  history: createWebHistory(),
  routes: [
    { path: "/", name: "Home", component: Home },
    { path: "/about", name: "About", component: About },
  ],
});

export default router;
js
// src/main.js
import { createApp } from "vue";
import App from "./App.vue";
import router from "./router";

createApp(App).use(router).mount("#app");
vue
<!-- src/App.vue -->
<template>
  <div id="app">
    <h1>欢迎来到 Vue Router 快速入门示例</h1>
    <nav>
      <router-link to="/">Home</router-link>
      <router-link to="/about">About</router-link>
    </nav>
    <router-view />
  </div>
</template>

<script setup></script>

<style scoped>
#app {
  text-align: center;
  color: #2c3e50;
}
nav a {
  padding: 12px;
}
</style>
组件说明
router-link:声明式导航,支持to、replace、active-class等属性。router-view:渲染当前匹配的路由组件,支持嵌套。
history 模式与服务端
createWebHistory() 依赖服务端正确返回同一 HTML(例如配置 Nginx 的 fallback)。否则用户在刷新非根路径时会得到 404。
常见坑
- 忘记在入口通过
app.use(router)安装路由。 - 内部跳转使用
<a>导致整页刷新,应使用<router-link>或router.push。 - 错配
base或静态资源路径,导致 history 模式下资源 404。
路由模式选择
history:更优雅的 URL,无#;需服务器支持回退到入口 HTML。hash:URL 中包含#,不需服务器配置;适合静态托管或无服务端支持场景。
js
import {
  createRouter,
  createWebHistory,
  createWebHashHistory,
} from "vue-router";
const router = createRouter({
  history: createWebHistory(), // 或 createWebHashHistory()
  routes: [],
});
选择建议
- 有服务端支持:优先
history。 - 纯静态场景:使用
hash更省事。
路由特性速览与示例
动态参数(params)
js
// /src/router/index.js
routes: [
  {
    path: "/user/:id",
    name: "User",
    component: () => import("../views/User.vue"),
  },
];
vue
<!-- /src/views/User.vue -->
<template>
  <section>
    <h2>User {{ id }}</h2>
  </section>
</template>
<script setup>
import { useRoute } from "vue-router";
const route = useRoute();
const id = route.params.id;
</script>
编程式导航
js
import { useRouter } from "vue-router";
const router = useRouter();
router.push({ name: "User", params: { id: 123 } });
嵌套路由(children)
js
// /src/router/index.js
routes: [
  {
    path: "/settings",
    component: () => import("../views/Settings/index.vue"),
    children: [
      {
        path: "",
        name: "SettingsHome",
        component: () => import("../views/Settings/Home.vue"),
      },
      {
        path: "profile",
        name: "SettingsProfile",
        component: () => import("../views/Settings/Profile.vue"),
      },
    ],
  },
];
vue
<!-- /src/views/Settings/index.vue -->
<template>
  <h2>Settings</h2>
  <nav>
    <router-link to="/settings">Home</router-link>
    <router-link to="/settings/profile">Profile</router-link>
  </nav>
  <router-view />
</template>
懒加载(按需加载)
js
const routes = [
  { path: "/", component: () => import("../views/Home.vue") },
  { path: "/about", component: () => import("../views/About.vue") },
];
性能建议
- 为中大型应用启用路由组件懒加载,减少首屏包体积。
- 对频繁访问的页面可考虑预加载(
link rel="preload"或框架提供的预加载手段)。
命名路由与别名
js
{ path: '/about', name: 'About', component: About, alias: ['/intro', '/info'] }
// 使用 name 导航更稳健
router.push({ name: 'About' })
命名与路径维护
更改 path 不影响以 name 为目标的导航;相反如果只用 to:'/about',重构路径时更容易遗漏。
进一步了解
- 导航守卫:全局、路由、组件内守卫,可用于鉴权与数据预取。
- 路由元信息:
meta可携带权限、标题等辅助信息。 - 链接活跃样式:默认类名
router-link-active/router-link-exact-active。
更多高级用法请参考官方文档:https://router.vuejs.org/zh/
学习建议
- 先掌握“快速入门”和“动态参数、嵌套、懒加载”。
- 再逐步引入“命名路由、别名、守卫、元信息”等增强特性。